What are the best relics in 33 Immortals?
There is no permanent best relic for every weapon and every group. The best pick is the relic that fixes the run's next failure point: Action Relics improve or modify active play, Boost Relics strengthen reliable baseline output, and Duo Relics reward two players who coordinate compatible choices.
For a first clear, consistency usually beats a flashy combo. Prioritize survival, resource stability and effects you can trigger on purpose. Once the group is surviving rooms and boss patterns, shift later choices toward damage, cooldown efficiency or a Duo pairing that both players can actually maintain.
If an effect depends on a condition you rarely trigger, it is weaker than a smaller effect that works throughout the run. Read the trigger, confirm your weapon can use it, then compare it with the group's current weakness.
Action, Boost and Duo Relic paths explained
The v1.0 update reorganized the relic system into three readable paths. Treat the path as the relic's job, not as an automatic quality ranking.
Action
Change what you do
Action Relics alter attacks, dodges, weapon actions or another behavior you actively perform. They are strongest when the trigger matches your normal combat rhythm.
Pick it when: you can trigger the effect repeatedly without taking extra risks or breaking your weapon rotation.
Boost
Raise reliable output
Boost Relics improve a stable stat, resource or repeated outcome. They are often the safest choice when the run needs dependable damage, recovery or efficiency.
Pick it when: your build already functions and you want a consistent increase instead of another condition to manage.
Duo
Coordinate with one ally
Duo Relics create paired benefits when two players select compatible effects. Their ceiling is high, but only if both players understand the pairing and stay close enough to use it.
Pick it when: you have a communicating partner and the pair supports both weapons rather than forcing one player into a bad pick.
This three-card path view is an editorial decision graphic, not an in-game screenshot. Exact names, numbers and balance values can change in live patches, so verify the current tooltip before spending a rare choice.
How to use an all-relics list without getting trapped by it
A flat list is useful for recognition, but the decision still depends on trigger, uptime and team need. Classify each live tooltip with this four-column check.
| Path | Main job | Good examples of fit | Warning sign |
|---|---|---|---|
| Action | Modify an input, weapon action or combat event | Frequent dodge, repeatable special, reliable hit pattern | The trigger asks you to play less safely or interrupts your strongest loop |
| Boost | Increase a stat, resource or repeated result | Stable damage, recovery, cooldown or resource support | The bonus improves a stat that is not limiting the run |
| Duo | Create a paired effect between two coordinated players | Frontline plus support, control plus burst, shared positioning | The partner is random, far away or using an incompatible plan |
| Blessed | Upgrade an owned relic into a stronger version | A core effect with high uptime that already defines the build | Upgrading a weak or rarely triggered effect just because it is available |
Relic slots and upgrades: build a core before adding clutter
Your relic bar is limited, so every slot has an opportunity cost. Before taking a new effect, ask whether it strengthens the same plan as your current relics or starts a second plan that will never receive enough support.
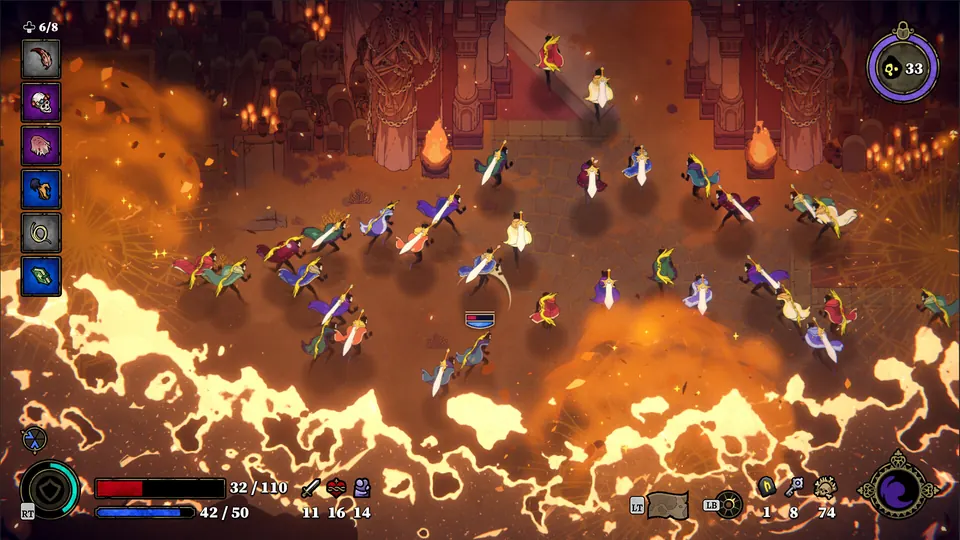
The official v1.0 notes also describe Relic Slot upgrades and stronger slot progression. More capacity is valuable, but a coherent smaller setup can outperform a full bar of unrelated triggers. The screenshot below shows the live combat HUD context where relic choices must remain readable during a crowded 33-player run.
- Keep one clear build goal: survival, resource stability, control or damage conversion.
- Upgrade effects with high uptime before niche effects that only matter in one room.
- Do not take a Duo Relic unless the matching player can identify and use the pair.
- Re-read tooltips after major updates; community tier lists may describe older values.
What are Blessed Relics in 33 Immortals?
Blessed Relics are stronger versions of relics already in your build. The v1.0 update introduced Angelic Urns that can offer Blessed upgrades, turning an effect you already understand into a more powerful part of the run.
The safest Blessed target is usually a relic with frequent activation and direct relevance to the run's main plan. A rare-effect upgrade can look exciting but still contribute less than improving the effect that is active in every room.
Choose the upgrade that improves your most reliable relic. Only bless a situational effect when the next biome, boss or team composition makes that situation central.
Best relic path by run situation
Use the table as a live decision aid. It deliberately ranks needs, not permanent item names, because balance values and the available pool can change.
| Run situation | Priority | Why | Avoid |
|---|---|---|---|
| The group is dying in normal rooms | Reliable Boost or defensive Action | Survival and recovery create more total damage by keeping players active. | Fragile condition chains and greed-only damage picks |
| Your weapon loop is stable | Action Relic matching the loop | A repeatable trigger converts weapon comfort into extra value. | Effects tied to an attack or resource you rarely use |
| Two friends are coordinating | Compatible Duo pair | Communication raises uptime and lets each player cover a role. | Taking a pair before agreeing who uses which half |
| Boss damage is the only failure | Boost damage or cooldown efficiency | The group already survives; concentrated output shortens the dangerous phase. | Room-clear effects that do little against the boss |
| A core relic is offered as Blessed | Bless the high-uptime core | Upgrading a proven effect is usually safer than adding another unsupported mechanic. | Blessing the rarest-looking option without checking uptime |
Relic Wishing: how to target the collection you actually need
The v1.0 update added Relic Wishing as a progression system tied to Eternal Shards. It helps players target relics instead of relying only on broad random discovery. Treat it as a collection-priority decision, not a promise that every wished relic will be best in every run.
Spend toward the path or missing option that expands a real build. If your collection already supports several damage plans but lacks recovery or team utility, another narrow damage unlock may add less value than filling that gap.
- 1
Audit your missing role
Identify whether your collection lacks survival, resource support, boss output or a usable Duo partner option.
- 2
Choose a path with multiple useful outcomes
A broad path that supports several weapons is safer than chasing one effect for a single niche setup.
- 3
Verify the current live pool
Check the in-game collection and patch notes before spending Eternal Shards because availability and balance can change.
Common relic mistakes
Copying a launch-week tier list
A list may use old values or ignore your weapon. Use it for ideas, then verify the current tooltip and trigger.
Forcing a Duo setup in matchmaking
Duo Relics lose value when the partner cannot coordinate, stays far away or never selected the matching half.
Adding too many conditions
A build with several unrelated triggers is harder to execute than one coherent loop with high uptime.
Ignoring the next failure point
More damage is not the answer when the group is losing revives, resources or room control before the boss.
Sources checked
- Official v1.0 update notes - Used for the Action, Boost and Duo paths, Blessed Relics, Relic Slot upgrades and Relic Wishing.
- Official Steam listing - Used for current game positioning and the two official visual assets on this page.
- NoobFeed relic usage guide - Used as secondary gameplay context for relic slots, equipping and upgrades; live tooltips remain the final authority.